This Bracelet Pattern Looks Even Better Doubled!
After proving my string-length template worked, it was time for the next challenge…
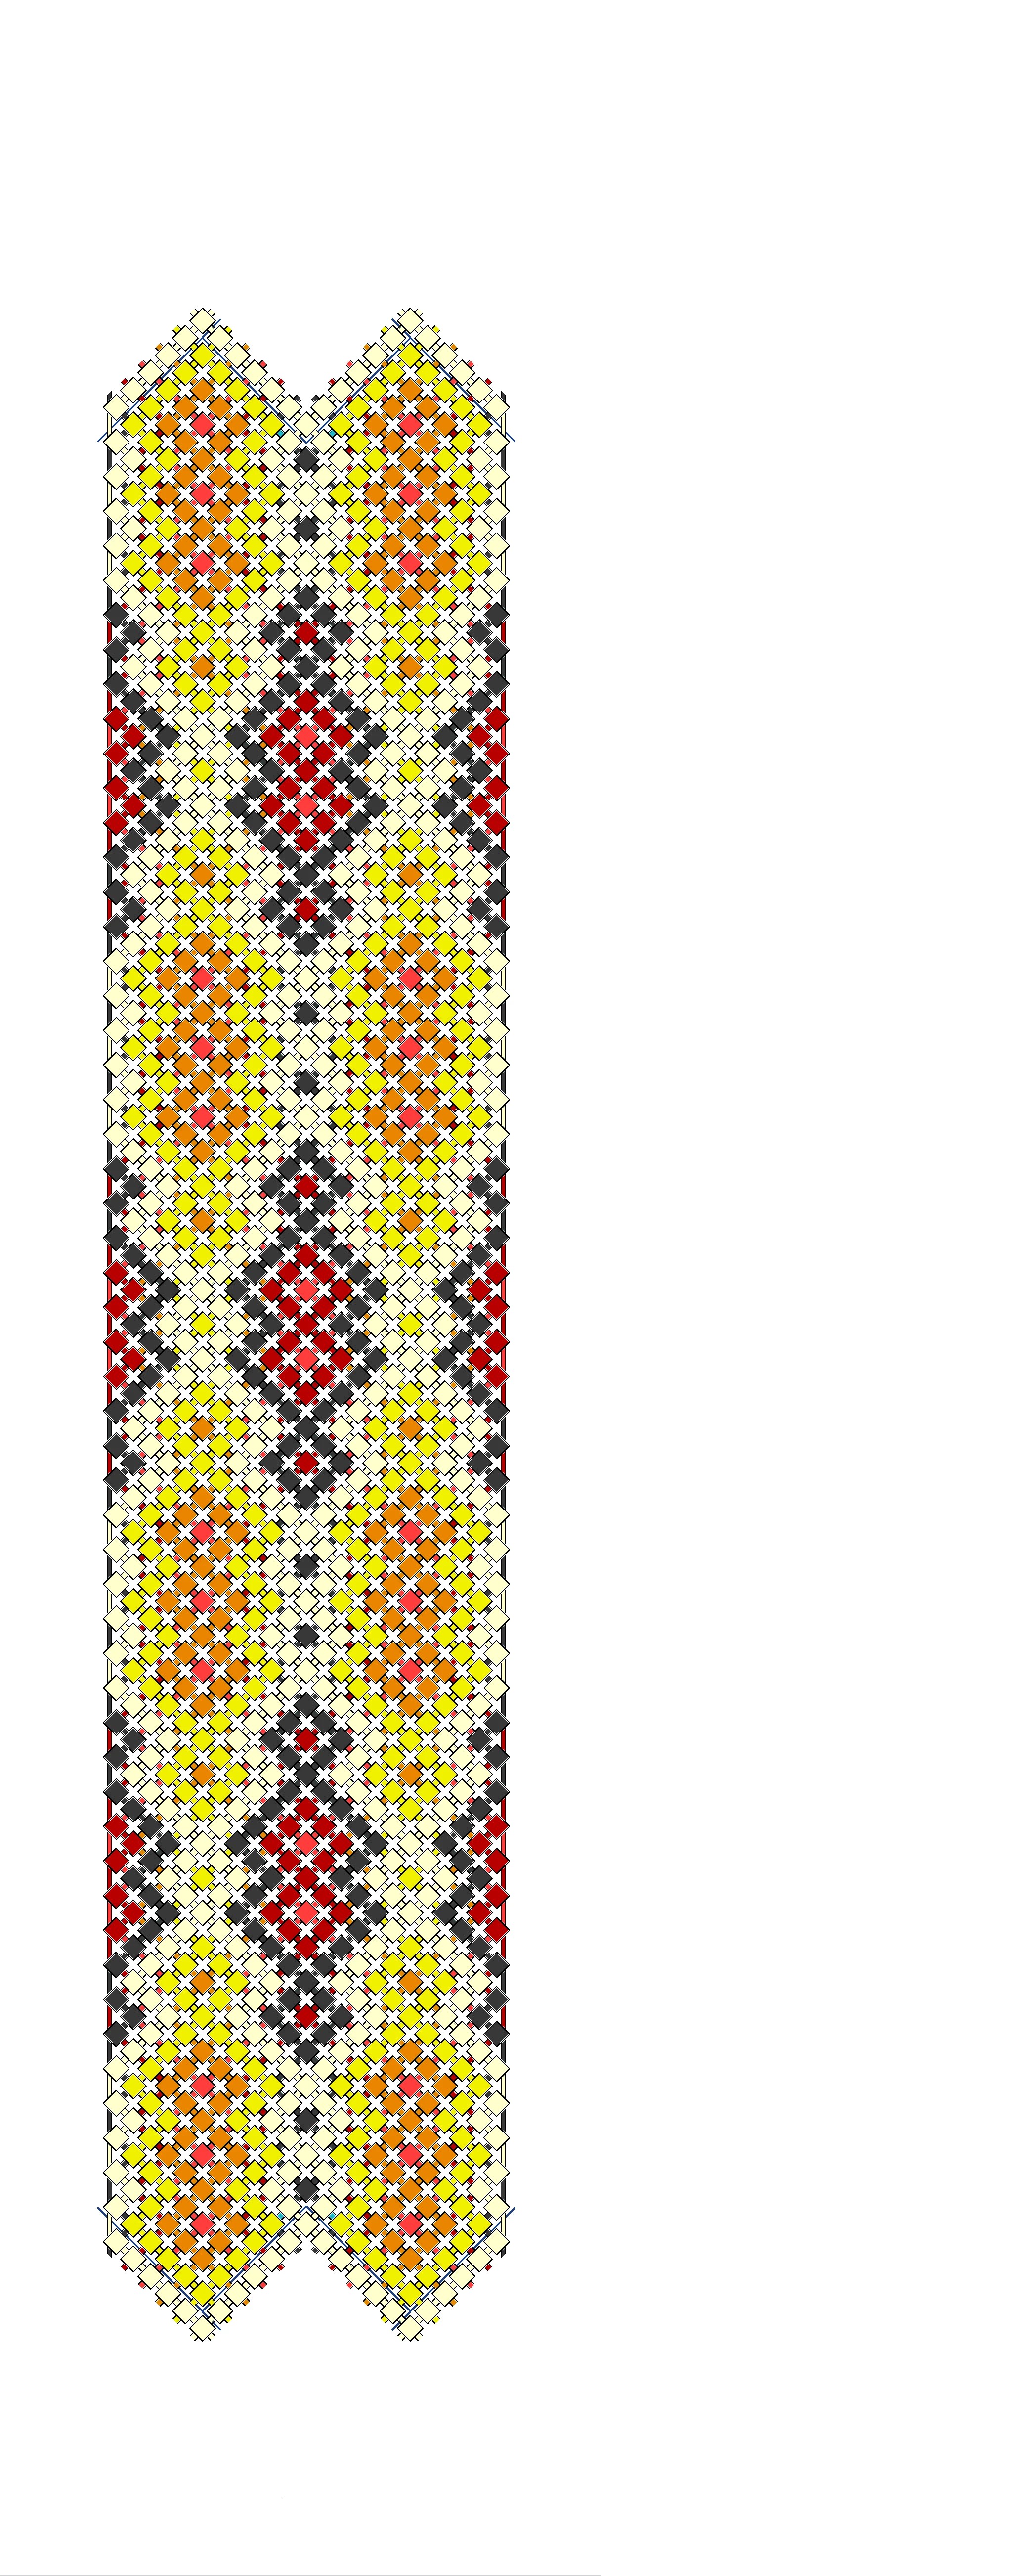
What happens if I double the entire bracelet pattern?
In this video, I take the custom pattern from my previous experiment and transform it into a much wider design. It wasn’t quite as simple as copying and pasting—I quickly discovered the spacing and alignment needed to be adjusted by hand before everything lined up correctly.
Once the layout came together, the design really started to shine. The added center section creates new diamonds, expands the darker decorative elements, and gives the bracelet a completely different feel while still keeping the original inspiration intact.
Because this pattern is so much larger, I won’t be filling in every underlying strand during the video. Instead, I’ll finish the complete pattern afterward and upload it to the website for anyone who wants to make it themselves.
In this video:
- Expanding a bracelet pattern into a double-wide version
- Adjusting and aligning a mirrored design
- Using GIMP to speed up pattern creation
- Planning a bracelet before tying a single knot
- Previewing the finished layout
I’m excited to see this one tied for real—it’ll definitely take a while, but I think it’s going to be worth every knot.
A huge thank you to my YouTube Members for making these projects possible. This pattern was actually designed live during a members livestream, and your support helps keep these experiments going!
If you like this pattern and would like to support my work >>>

This bracelet started as a simple experiment…
Could I design a friendship bracelet that used one string almost continuously from beginning to end, and would my template still provide enough string?
The answer was yes.
Then I asked an even bigger question:
What happens if I double the entire pattern?
This video follows the finished double-wide version, which took 175 minutes—almost 3 hours—to complete! Along the way I talk about the design process, why the bracelet works, the mistakes I made (and had to undo), and some of the techniques I’ve learned over decades of making friendship bracelets.
One of my favorite details is that the design originated from a simple Arrowhead idea. By extending one strand out to the edge before immediately sending it back toward the center, it creates a completely new pattern. Even better, the doubled version reveals a color that barely appears in the original bracelet, adding a subtle detail right down the middle.
In this video:
- Tying my custom double-wide bracelet
- Segment knotting tips and workflow
- Why working close to the clip improves consistency
- Recovering from mistakes while knotting
- How this pattern evolved from an Arrowhead design
- Why this experiment changed the way I’ll design future bracelets
This bracelet was made using leftover string from my recent bag project, and I’m already planning another version using doubled strands to compare the look, durability, and knotting speed.
A huge thank you to my YouTube Members for helping make these projects possible. Your support keeps the tutorials, website, and new pattern designs coming!
👍 If you enjoyed this video, please Like, Subscribe, and leave a comment:
Would you rather spend three hours making one incredible bracelet, or three simpler bracelets in the same amount of time?
🌐 Find this pattern and many more friendship bracelet tutorials at:
https://akaawol.com
💬 Have questions or want help designing your own bracelet? Leave a comment or join the conversation on Discord!
#friendshipbracelet #friendshipbracelets #bracelettutorial #braceletpattern #akaawol #jewelrymaking #diy #craft #friendshipbracelettutorial #segmentknotting #patternmaking #arrowhead
