Designing a 16-String Friendship Bracelet from Pattern 7487
What happens when you take a friendship bracelet pattern you like… and start changing it?
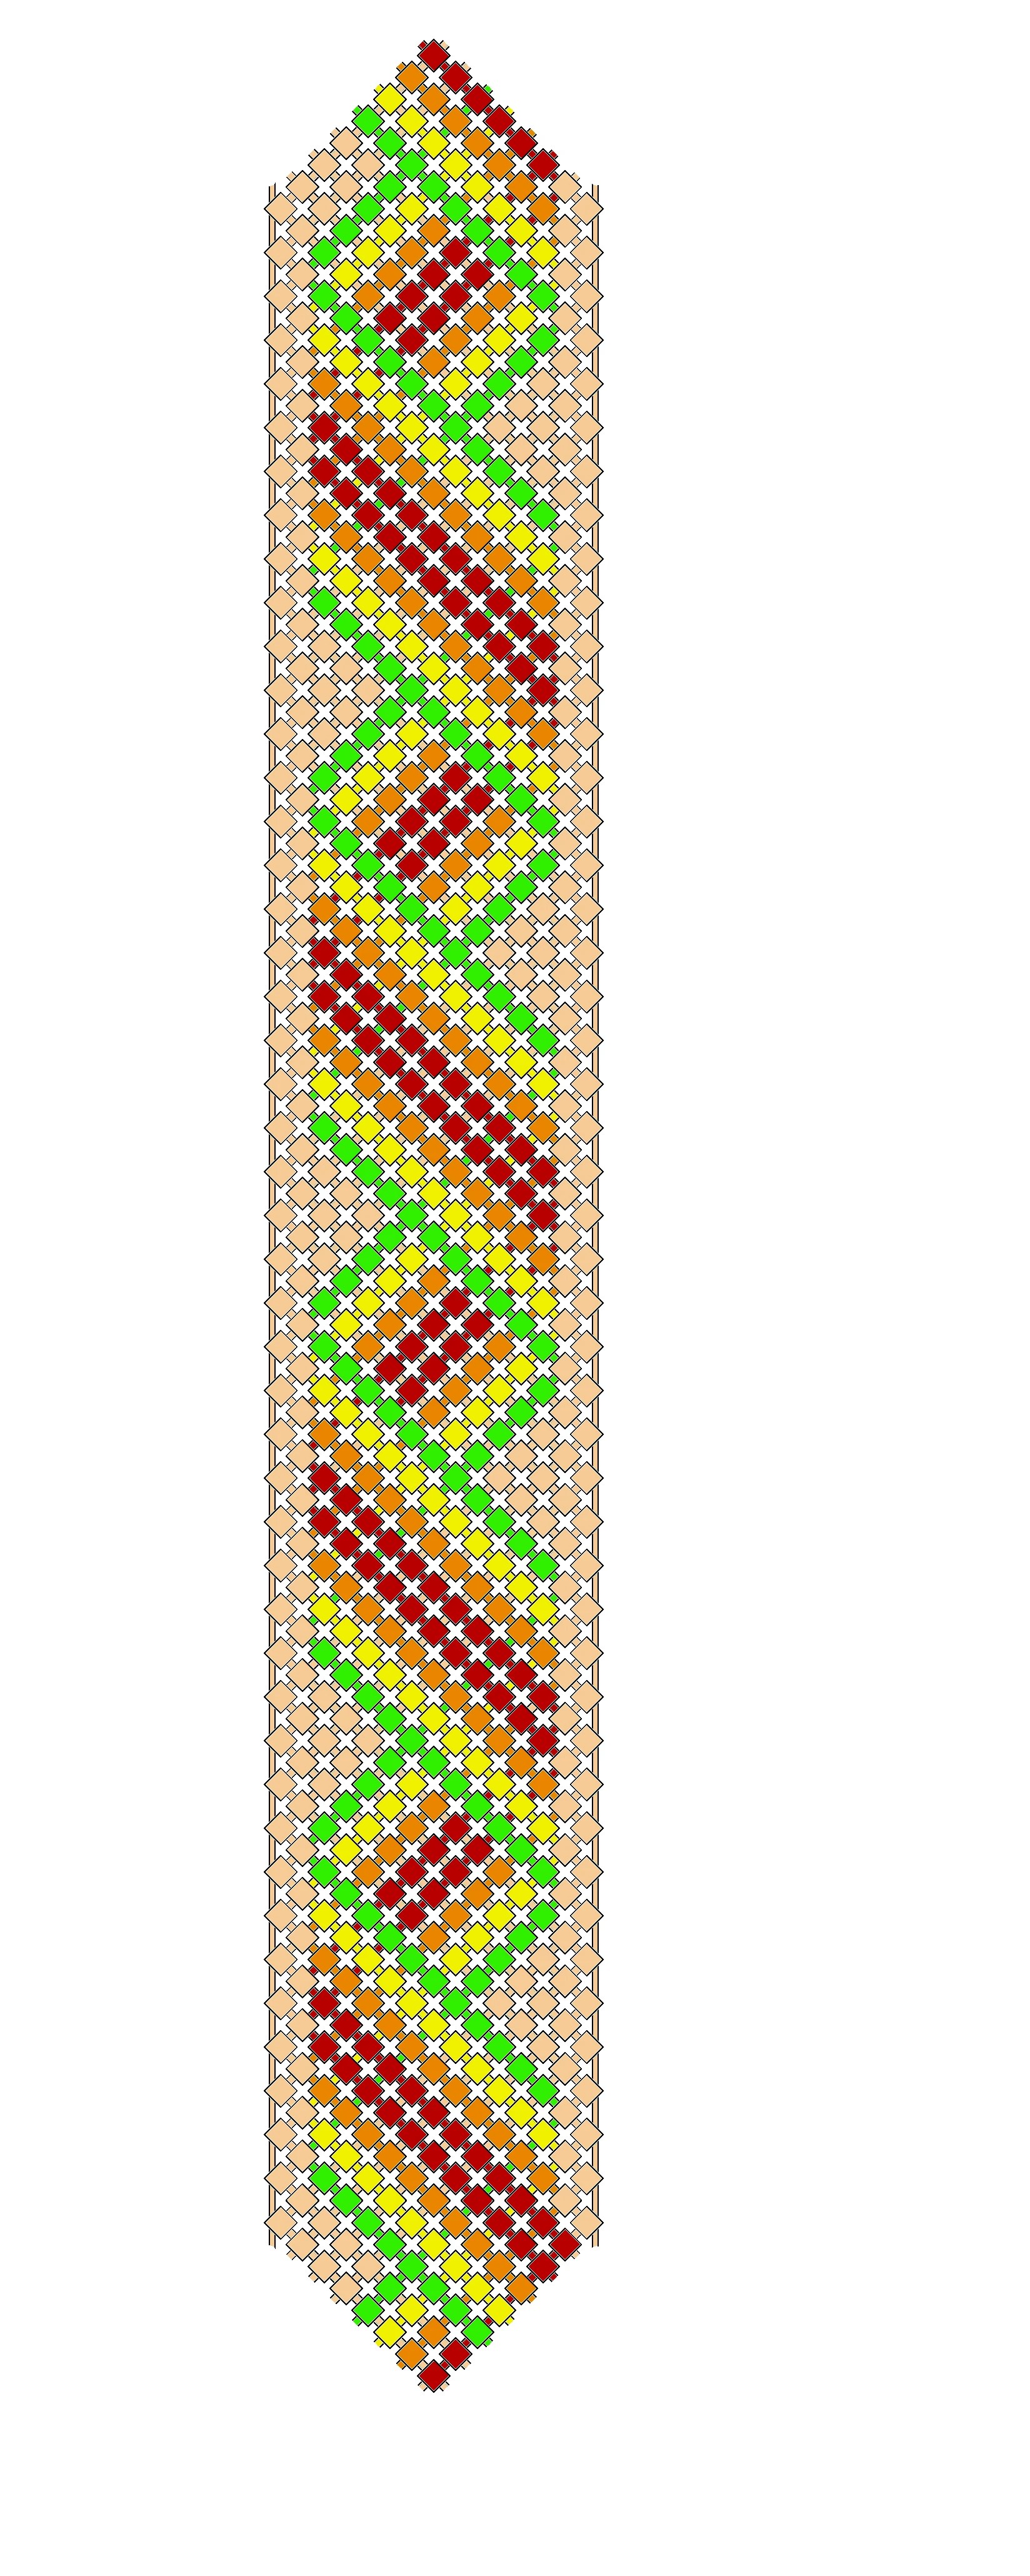
In this video, I’m working from pattern #7487 as inspiration, but Mandy’s take on the design has changed it so much that we’re definitely heading into something new. I’m taking the original idea from 12 strings to 16, adding an outside border, changing the color structure, and figuring out how to make that ribbon-like design flow all the way through the bracelet.
You’ll see the actual design process—including checking the string paths, catching mistakes, working out the color changes, and trying to get the finished pattern reasonably balanced without forcing perfect symmetry.
This is one of my favorite parts of friendship bracelet making: using an existing pattern as a starting point instead of treating it as a set of rules. Once you understand how the knots and strings move, you can start asking, “What if I changed this?”
Tomorrow, I’ll actually make this bracelet and find out:
• Does the design look as cool in string as it does on screen?
• Is it easier or harder than the previous version?
• What problems show up while knotting it?
• And how long does it take to make?
Find more friendship bracelet tutorials, patterns, and projects at akaawol.com.
Have a pattern you think I should experiment with for a future Blindsided Creation? Drop your idea in the comments!
If you like this pattern and would like to support my work >>>

More strings. More knots. Less time?! 🧵
This is Mandy’s version of my experiment with friendship bracelet pattern #7487. I took the idea from 12 strings to 16, adding beige strings along the outside to create a border—and somehow I finished the entire bracelet in just under 2 hours.
I’m still trying to figure out how a bracelet with more knots ended up feeling faster!
There are a few other experiments happening here too. I reversed the blue gradient because there wasn’t enough contrast between the light blue and beige in my previous version. That small change gives the finished bracelet a surprisingly different look.
And that’s something I really want you to take away from these experiments: the colors shown in a friendship bracelet pattern are suggestions, not rules. Change them. Reverse them. Try a completely different palette. See what happens!
I also talk about keeping your friendship bracelets straight—and why I don’t think a “straight edge” technique automatically solves everything. Watch the bracelet as you knot. If it starts drifting or curving, make those tiny adjustments while you’re working instead of discovering the problem at the end.
Mine still ended up with one slightly wonky spot that bothers me. 😂 See if you can find it!
This version also uses a kumi loop, one of my favorite ways to finish the top of a bracelet.
Which version of this design should I revisit with an entirely new color combination?
🌐 Find more friendship bracelet tutorials, patterns, and inspiration at akaawol.com.
⭐ A huge thank you to my YouTube Members! Members help make these experiments possible and get videos like this early, giving them a chance to make the projects before the public videos are released. Hit the Join button next to Subscribe if you’d like to support the channel.
👍 Like the video if you enjoyed the experiment.
💬 Tell me what you think of the finished bracelet—and what colors you would use!
And as always, don’t get your strings in a bunch.
#akaawol #FriendshipBracelets #FriendshipBracelet #BraceletMaking #DIYJewelry #Knots #Kumi #CraftTutorial

